I am very much a fan of pixel art, old 8-bit computers, basically anything geeky and for a while I've been trying to master c2c crocheting for building 'pixel' designs.
The results weren't that great, I couldn't seemingly get solid blocks of colour, just weird looking triangles that didn't really help a design stand out from its background.
Then I discovered the "Filet method" - this is an interesting variant on C2C, worked in rows, starting with a grid design but then picked out in either a "Gap" (which is actually a set of chain stitches to the exact width of your 'pixels' or a set of triple crochet stitches (which are the 'filled in blocks' - or the pixels themselves!)
As you can see from the image on the left, this is fairly effective at giving you a shadowy version of a pixel design (albeit in one colour, I don't think I'm competent enough to swap between yarns to make different colours in a design yet, but theoretically that'd make the design 'pop' a lot more, as would mounting it on a bright coloured backing card or something similar).
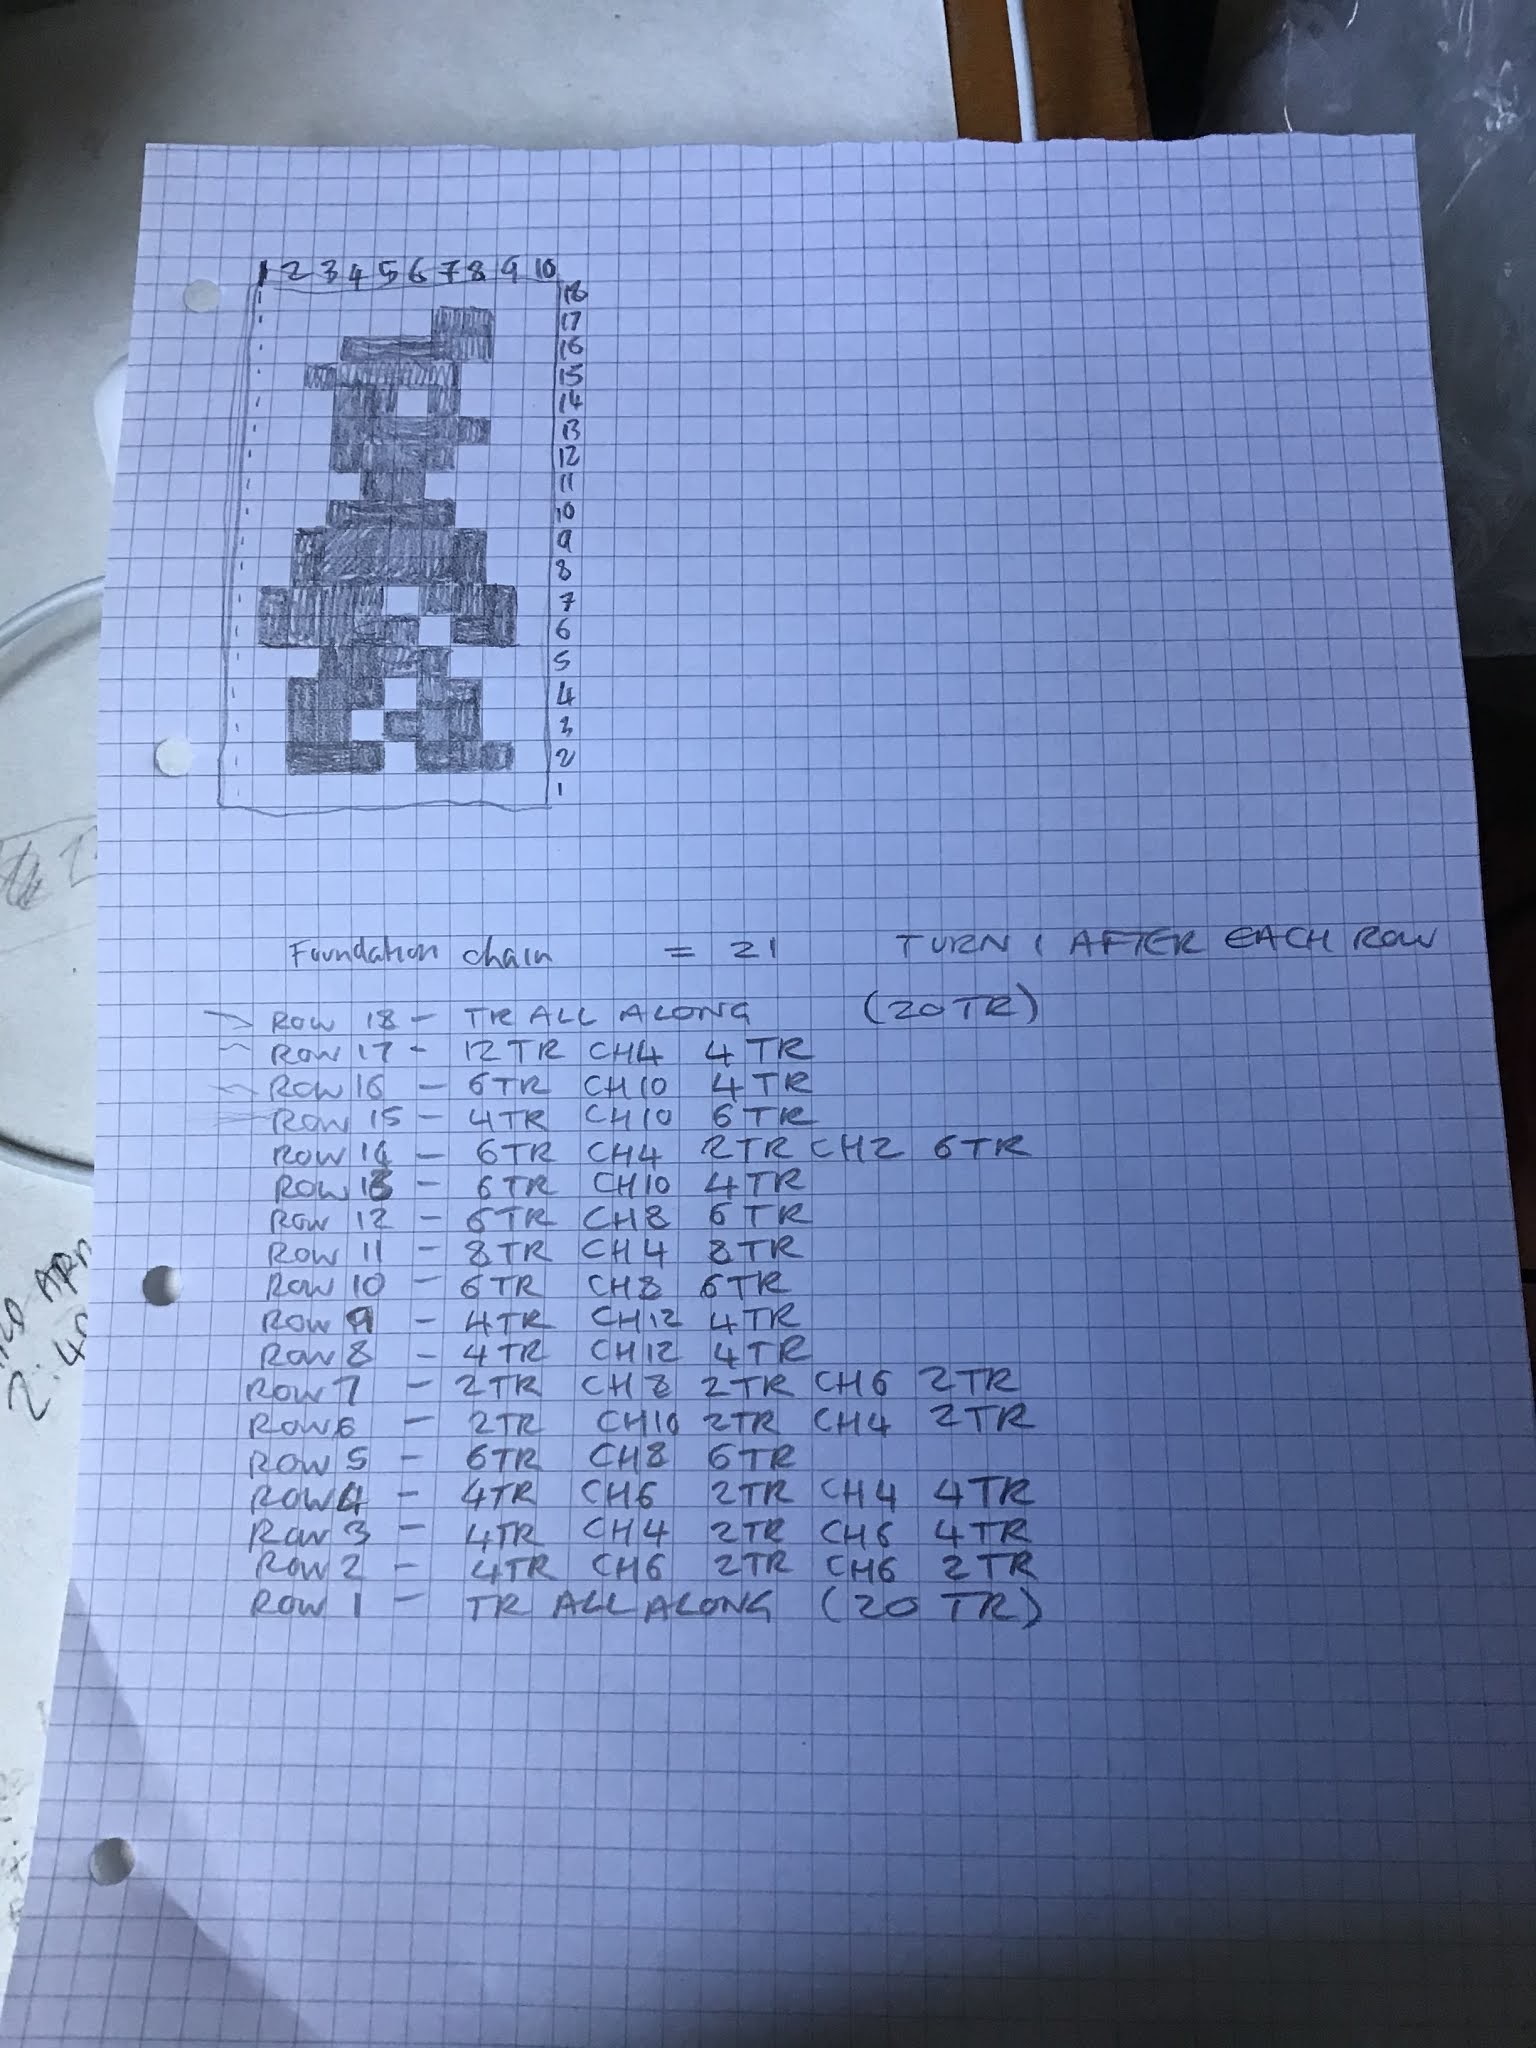
So I started out working up a grid for my design, look a bit more familiar from this?
I seem to spend a LOT of time drawing Miner Willy in pixels on graph paper for various projects (anyone who follows me on the Playstation 4 "Dreams" package will probably know I've attempted to build Manic Miner in Dreams many times and did the same exercise there!)
In Filet terms the way you work is weird, because you're actually 'flipping' your work at the end of each row (unless you're the sort of person who can work a filet row backwards. I am not that sort of person).
The other thing I hadn't anticipated was how to try and count the number of chains I would need to start with, and how that would translate to each pixel (or gap). The magic answer is that I ACTUALLY needed a foundation chain of 30 stitches for 10 rows of pixels (the width of Miner Willy as drawn on my graph sheet) rather than the 36 I ended up with (by just guessing - oh well at least I was close!)
The method itself once you've chained 30 stitches isn't that complicated though.
For a gap - you just chain 2 stitches, and miss out two stitches on the row below (this makes a sort of 'square' in your design, signifying a 'gap')
For a pixel you triple crochet 2 stitches - this fills in a pixel square (but bear in mind there are an extra 2 triple crochet stitches either side of a 'filled in' square - so that makes four in total.
For long filled-in areas you really do need to count those stitches super-accurately (and you also need to count your gap stitches, because no matter what, even when you're doing lots of gaps in a row you still need the triple crochet stitches to 'border' each gap as shown in the top image above).
At some point I'm going to draw up a proper 'filet' pattern for Miner Willy, and add it to my Ravelry account (purely because I seem to spend more time crocheting than I do designing things, and it'd be nice to pass on the info to someone else who initially struggled with this stuff). Would love to do some proper square pixel stuff though, in multiple colours so that's probably next on my challenge sheet!

Comments
Post a Comment